How to Add and Edit Tables in SendSites Proposals
By Declan · Updated June 2026
Insert, paste, and format tables in the SendSites editor to present room blocks, event space, and pricing clearly inside your proposal.
Tables are how you communicate the structured details of a proposal — guest room blocks, meeting space holds, multi-day catering pricing. The SendSites editor lets you build a table from scratch or paste one in directly from a spreadsheet, then refine the layout without leaving the page.
Open the editor toolbar
Click inside any editable text area in your proposal layout. The blue editing toolbar appears at the top of the section, giving you access to formatting controls including the table inserter.
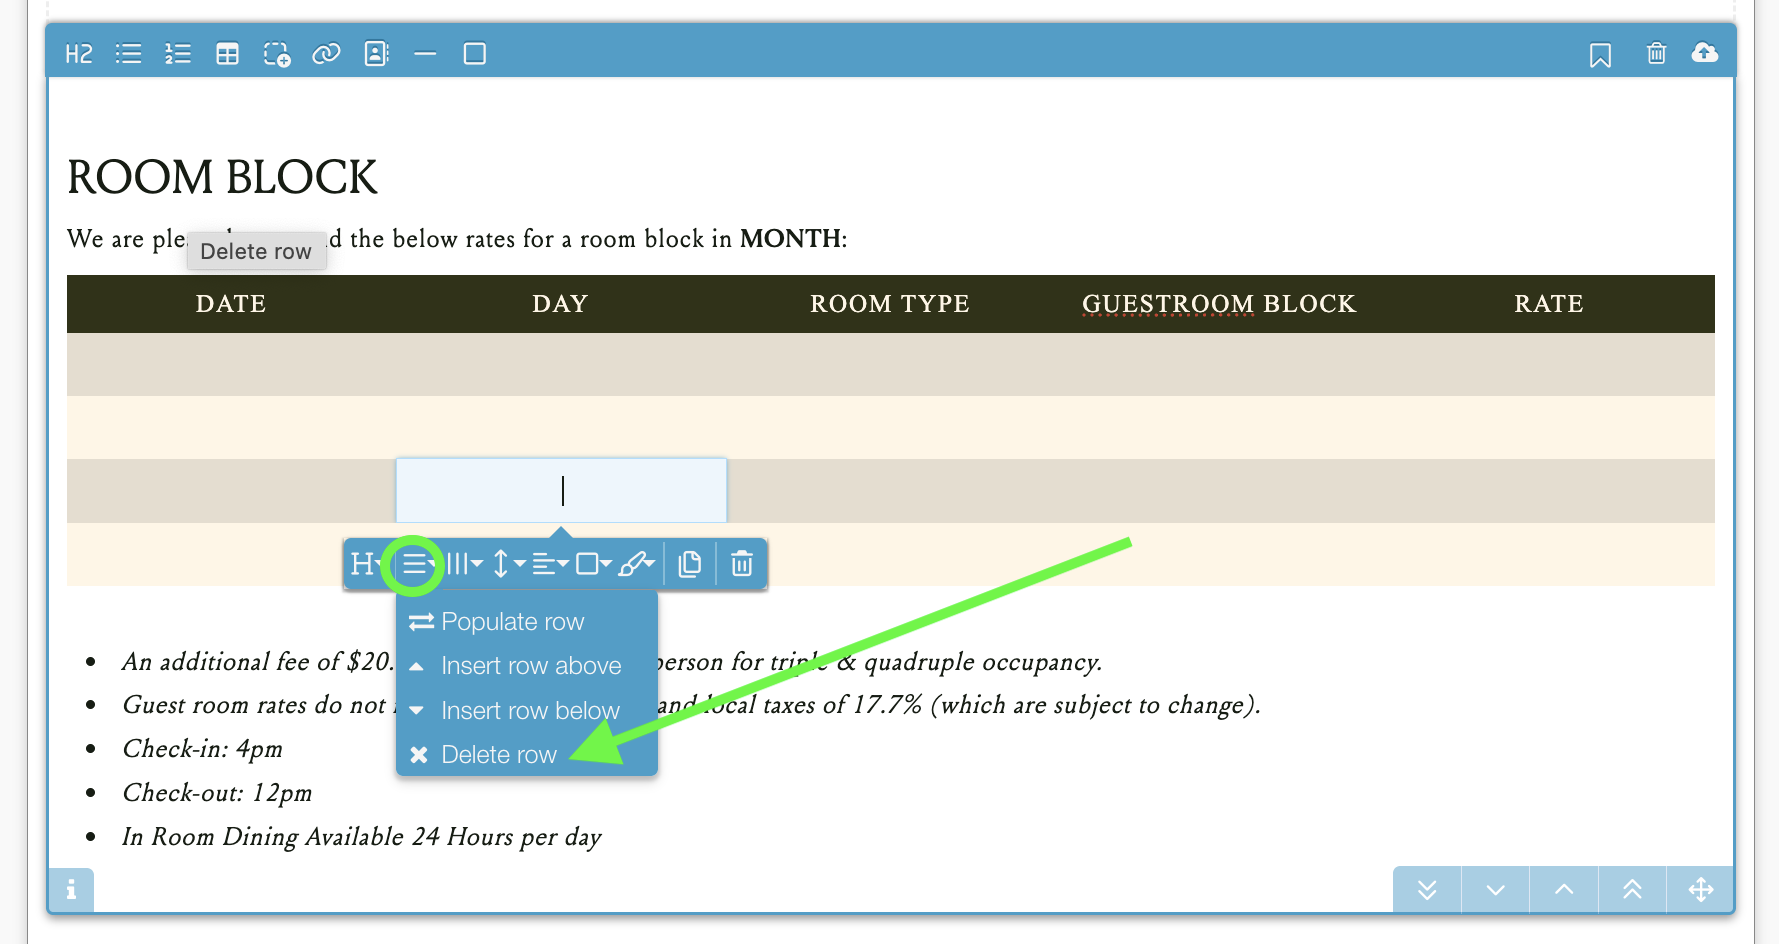
Insert a table from the toolbar
Place your cursor where you want the table to land and click the Table icon. A grid selector appears — drag across the squares to choose your row and column count (for example, 4x5) and click to insert. Type your data directly into each cell.
You can always add or remove rows and columns later, so don’t worry about getting the dimensions exactly right on the first pass.
Or paste a table from Excel or Google Sheets
If your room block, pricing tiers, or agenda already live in a spreadsheet, skip manual entry. Highlight the cells in Excel or Google Sheets, copy them (Ctrl+C / Cmd+C), click into your SendSites layout, and paste (Ctrl+V / Cmd+V). The editor builds a native table that mirrors your spreadsheet structure.
Style the header row
Click anywhere inside the table to reveal the table sub-toolbar. Click the Header Row icon to designate your top row as a header — the editor applies a distinct background and weight automatically so the column labels stand out.
Add or remove rows and columns
Use the directional insertion buttons in the sub-toolbar to append rows above or below, or columns left or right of the current cell. Delete controls in the same group let you trim the table as your numbers change.
Align the content inside each cell
Select one or more cells and adjust Horizontal Alignment (Left, Center, Right) and Vertical Alignment (Top, Middle, Bottom). Vertical alignment matters most when cells contain different amounts of text and you want the rows to read evenly.
Merge or split cells
To span a title or a promotional callout across multiple columns, select the adjacent cells and click Merge Cells. To break a merged cell back into its parts, select it and click Split Cells.
Adjust borders
Open the border styling dropdown to switch between No Borders, Table Borders, Header Borders, and Row Borders. Lighter border treatments usually read cleaner on a digital proposal than full gridlines.
Duplicate or remove the table
At the end of the sub-toolbar, Duplicate copies the entire table — useful when you need a second grid with the same structure for a different night or room type. Remove Table deletes the block entirely.
When pasting from a spreadsheet, paste into an empty line rather than inside an existing paragraph. The editor builds a cleaner table when it has room to drop the full grid on its own.
Confirming the table looks right
Preview the proposal before sending. Check that the header row reads clearly, that numbers line up in their columns, and that the table doesn’t push past the edge of the section on a narrower screen. If anything looks off, click back into the table and use the sub-toolbar to adjust — your changes save automatically.
Did this solve your problem?
Still need help? Email support — 30-minute acknowledgment.
Get in Touch